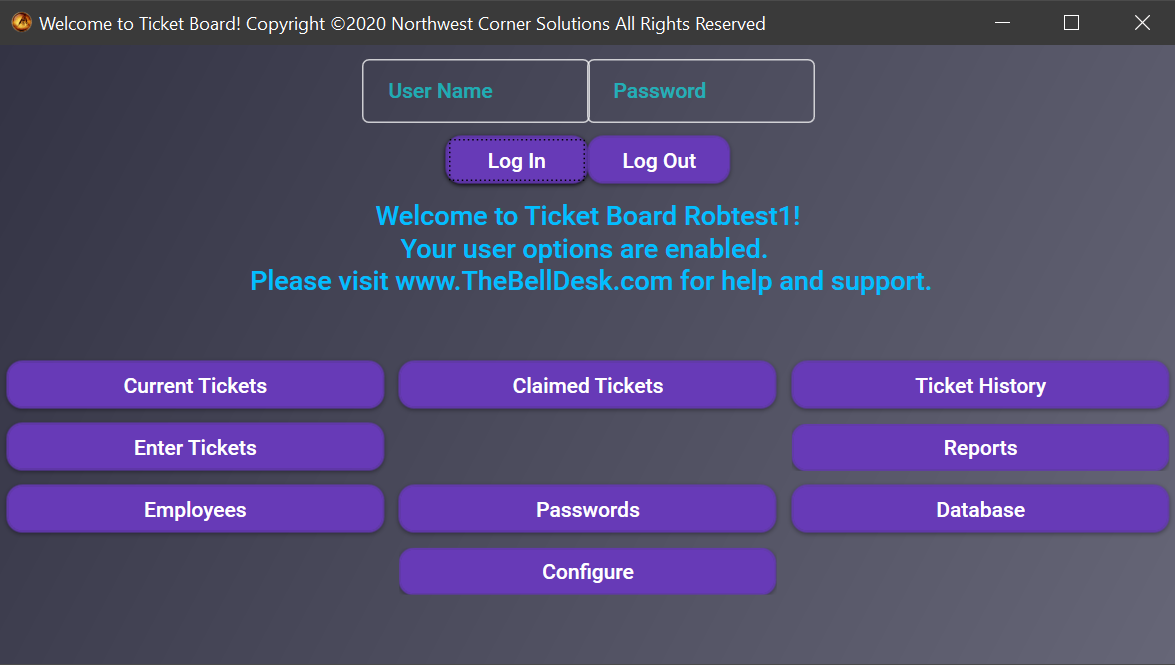
The first time you start Ticket Board, you must enter the default user name and password. The user name is admin and the default password is also admin.
When I created the database for your copy of Ticket Board, I include the default user name and password combination of admin / admin. Please change the password!
This is where you will input the information for your bell persons.
How to configure your scanner to input bar coded tickets!
The default user name and password is admin admin. You may use this combination to log in to the passwords window. User names and passwords can be created for individuals or for groups. The user levels will determine the level of access that each person or group will have to Bell Desk Insight. Each user name and password must be at least 6 characters, and include lower and upper case.
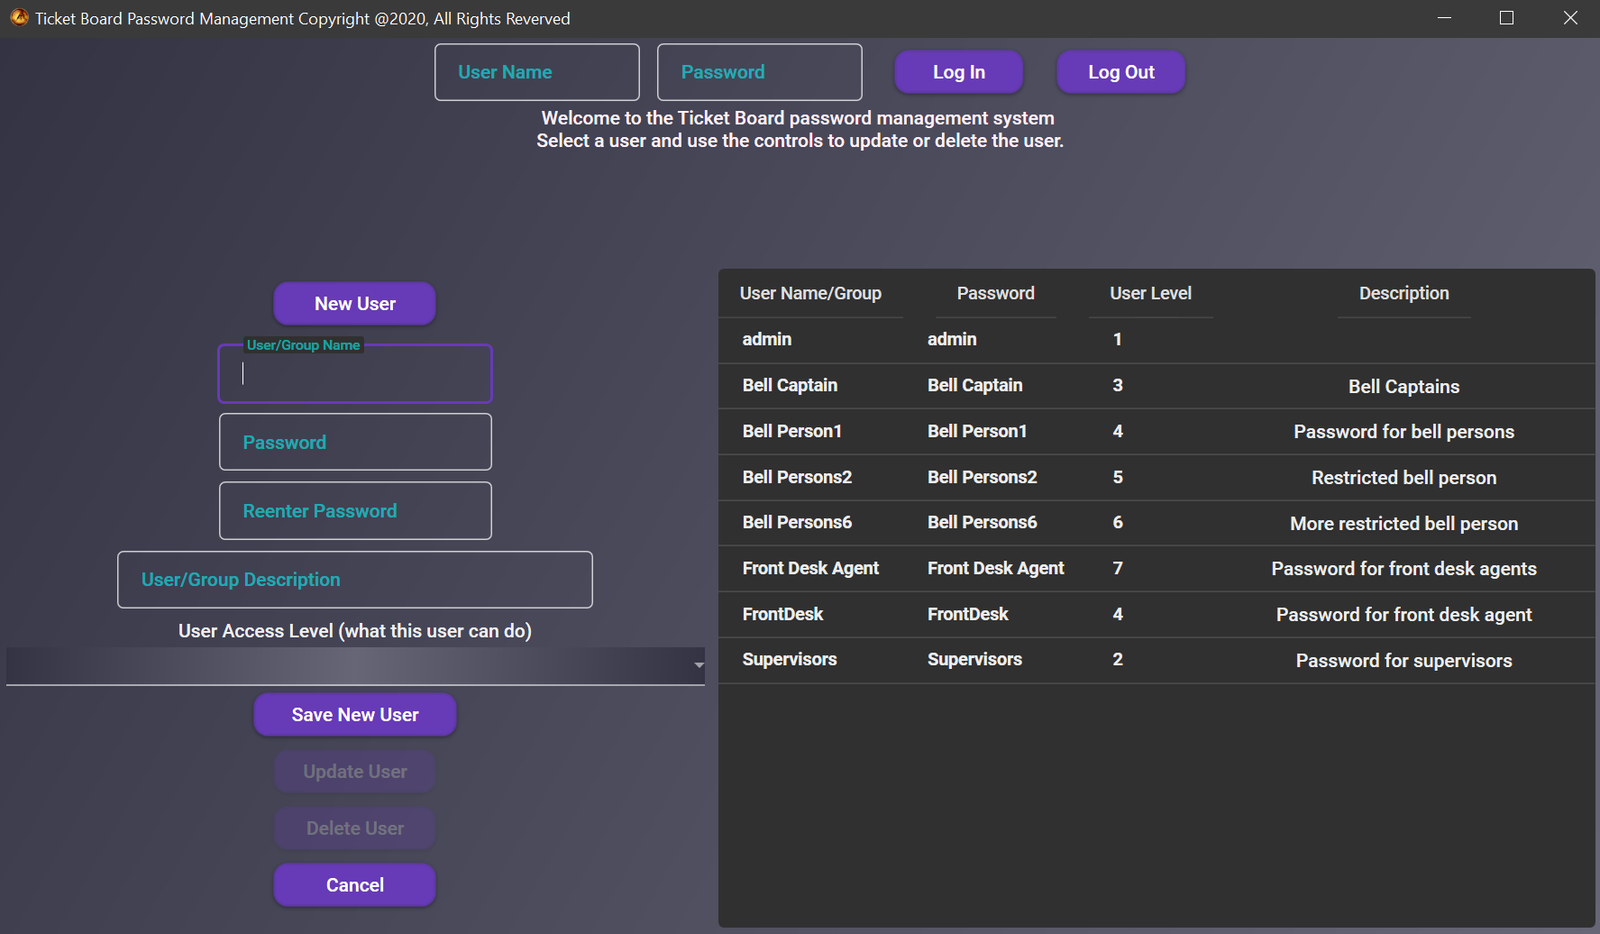
There must always be at least one user with a user level of 1. This guarantees that there will always be a user with complete access to the program, and all settings. I would use this level for department managers.
User level of 2 is the same as level 1, but there is no access to the database window. This can be used for supervisors or bell captains.
This user level was designed to be used by lower level supervisors and bell captains. These users will be able to access all functions necvessary for the day to day operations of the bell desk, but will not be able to make changes to the program.
This level only provides access where the user will be able to enter fronts, and will be able to scan for fronts or to be placed into the queue. This was designed for bell persons.
User level 5 is restricted to using only the version of the Dashboard where the bell person will only be able to scan in their id to be placed into the queue, or to scan for fronts when available. Designed to be used by bell persons.
This is the most restrictive user level for use by bell persons. They will only be able to scan in for fronts, and to be placed into the queue.
This user level was designed to be used by front desk agents to enter fronts into the system. This is the only access they will have.
With a user level of 8, the user will have access to all configuration settings for the program, but not to the features for the day tom day operations. This level was designed to be used by IT and support staff.
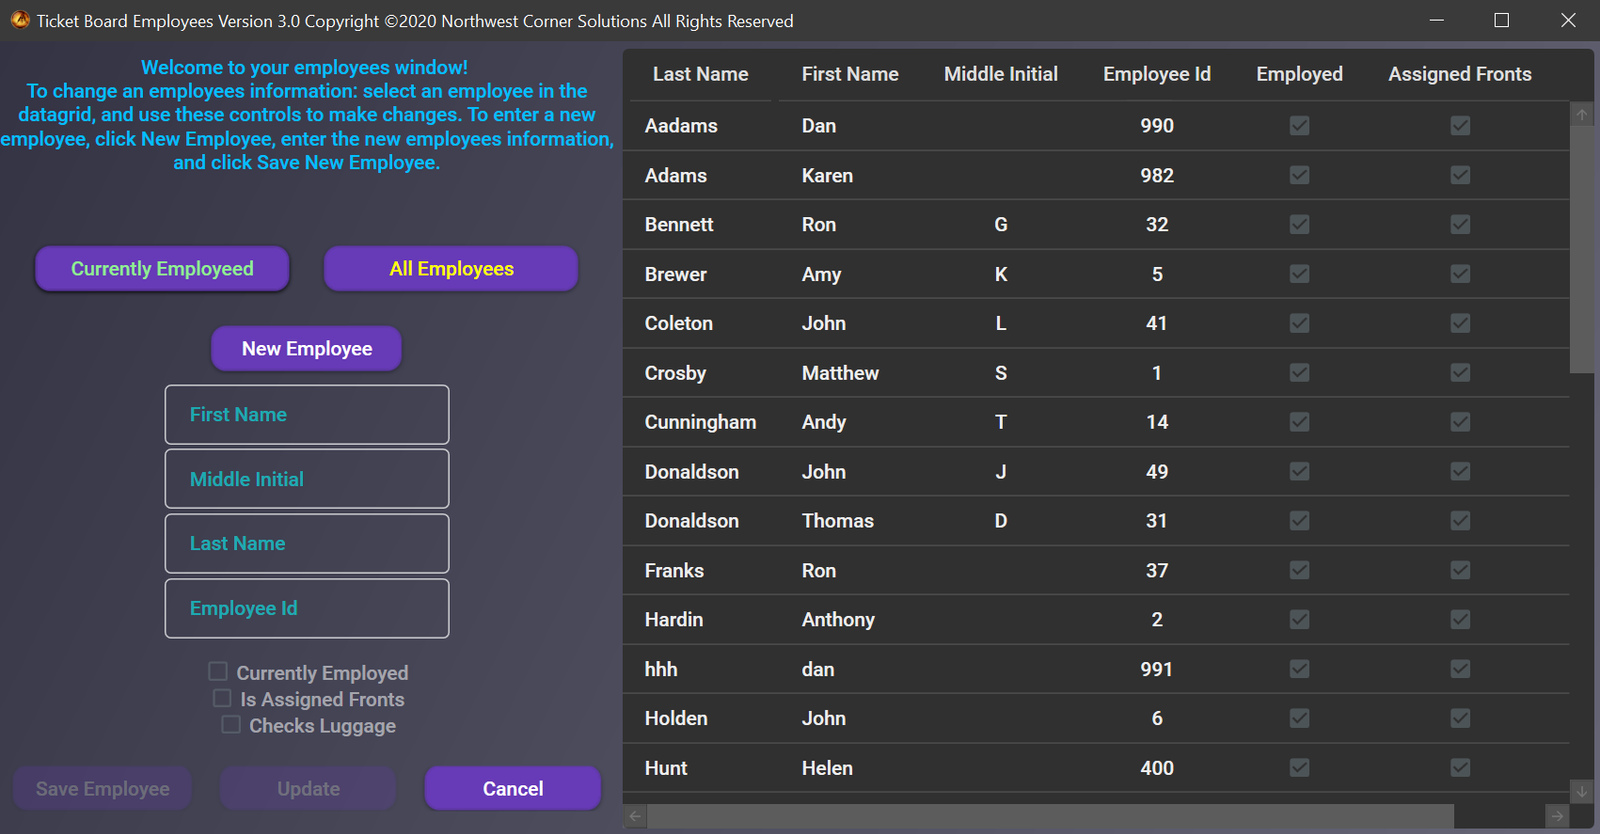
It is quite easy to add or make changes to your bell staff. To add a bell person, just click New Employee, enter the employees information, and save the employee. To make changes to an employee, select them in the data grid, make your changes, and update the employee. Bell persons cannot be deleted from the system. If a bell person is terminated, simply uncheck Currently Employed. The Is Assigned Fronts check box will allow you to assign fronts to this bell person. The Checks Luggage check box is used to filter out employees who are working, but will not be checking luggage.

The easiest for the bell captain and the bell staff, but the most complicated way for you, is to program your scanner to input as a prefix the caret character ^ (ASCII CODE 94), and a carriage return as a suffix. When your scanner is set up this way, you do not need to have any specific box or area focused for the program to accept the scanned in ticket. When a ticket is scanned, if it is a ticket that has already been entered into the system, the ticket will be selected in the data grid, and you may claim the ticket. If the ticket number is not found, the ticket number will be entered into the Ticket Number box ready to be entered into the system. The program will then move to the next required field. You may then scan in or enter the required information. You may also simply have either the Ticket Number box focused (to input a new ticket), or to have the Search Tickets box focused(to search for a ticket in the data grid) when you scan in the ticket. If you are entering the guest ids, you may also search for tickets by entering the guest id in the Search Tickets box.